

A skylight is one of the few residential remodel moves that changes the way a room feels at every hour of the day. Done right, it brings California daylight into kitchens, primary baths, hallways, and living rooms that would otherwise need lamps on at noon. Done wrong, it leaks. This post walks through how skylights are installed on Los Angeles homes — the two install methods, the flashing detail, the difference between an asphalt-shingle install and a Spanish-tile install, and the Title 24 thresholds that apply on a replacement versus a new opening.
Curb-mount versus deck-mount — two ways skylights attach to the roof
LA residential skylights come in two basic configurations:
- Curb-mount — the skylight sits on a site-built wood curb, typically 2x6 or larger, framed up from the roof deck. The unit drops onto the curb and is fastened from the sides. Curb-mounts are common on flat and low-slope roofs and on retrofits where added height above the roof line is acceptable.
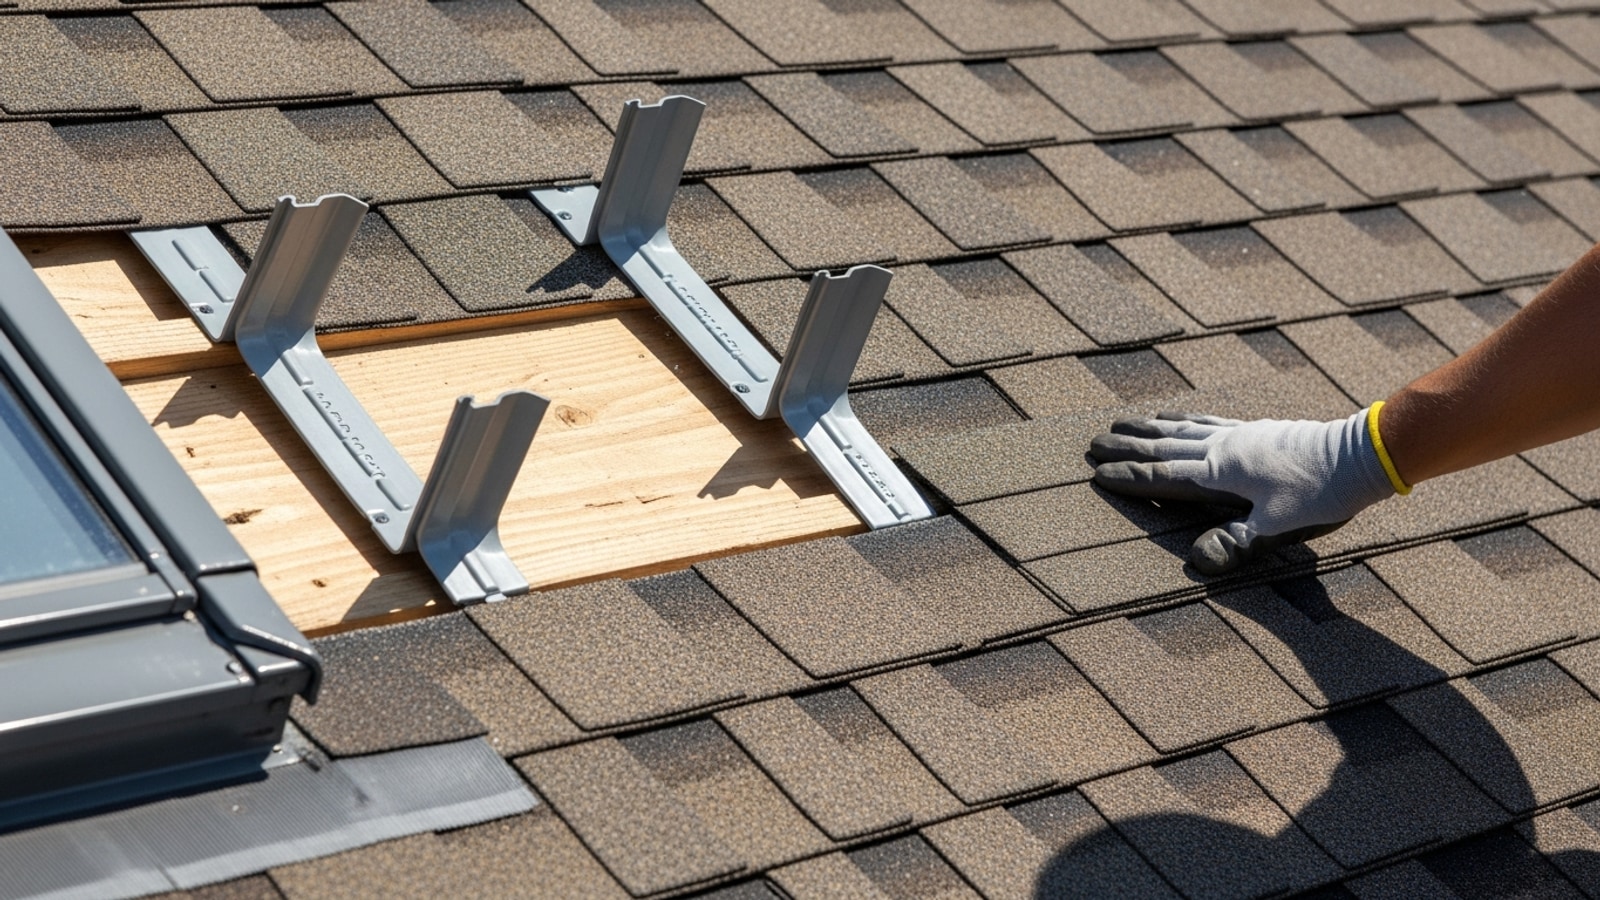
- Deck-mount — the skylight has an integrated low-profile flange that nails or screws directly to the roof deck. The roofing material laps over the flange and the manufacturer's flashing kit. Deck-mounts sit closer to the roof line and are common on steep-slope shingle and tile roofs.
Both methods can be installed correctly. The choice is driven by the existing roof, the slope, and what the homeowner wants the unit to look like from outside.
How the install is sequenced
A typical LA install runs in this order:
- Cut the rough opening from inside, between the rafters, sized to the unit and the framing detail.
- Frame the curb (curb-mount) or prepare the deck flange location (deck-mount).
- Install peel-and-stick ice/water shield underlayment around the opening, lapped onto the curb or deck.
- Set the skylight onto the curb or deck and fasten per the manufacturer's instructions.
- Install the flashing — step flashing for asphalt shingle, the manufacturer's tile-flashing kit for clay or concrete tile, the appropriate flashing for membrane on a flat roof.
- Integrate the roofing material over and around the flashing, course by course.
- Finish the interior — frame and drywall the shaft from the rough opening down to the ceiling line, tape, prime, and paint.
Flashing on a shingle roof versus a Spanish-tile roof
Almost every leaking skylight is a flashing problem, not a unit problem. The flashing detail is what makes the install last.
On an asphalt-shingle roof, the flashing is a step flashing — L-shaped pieces bent at 90 degrees over the curb, lapped under each successive shingle course up the slope. Done in order, it sheds water down and away from the curb at every shingle line.
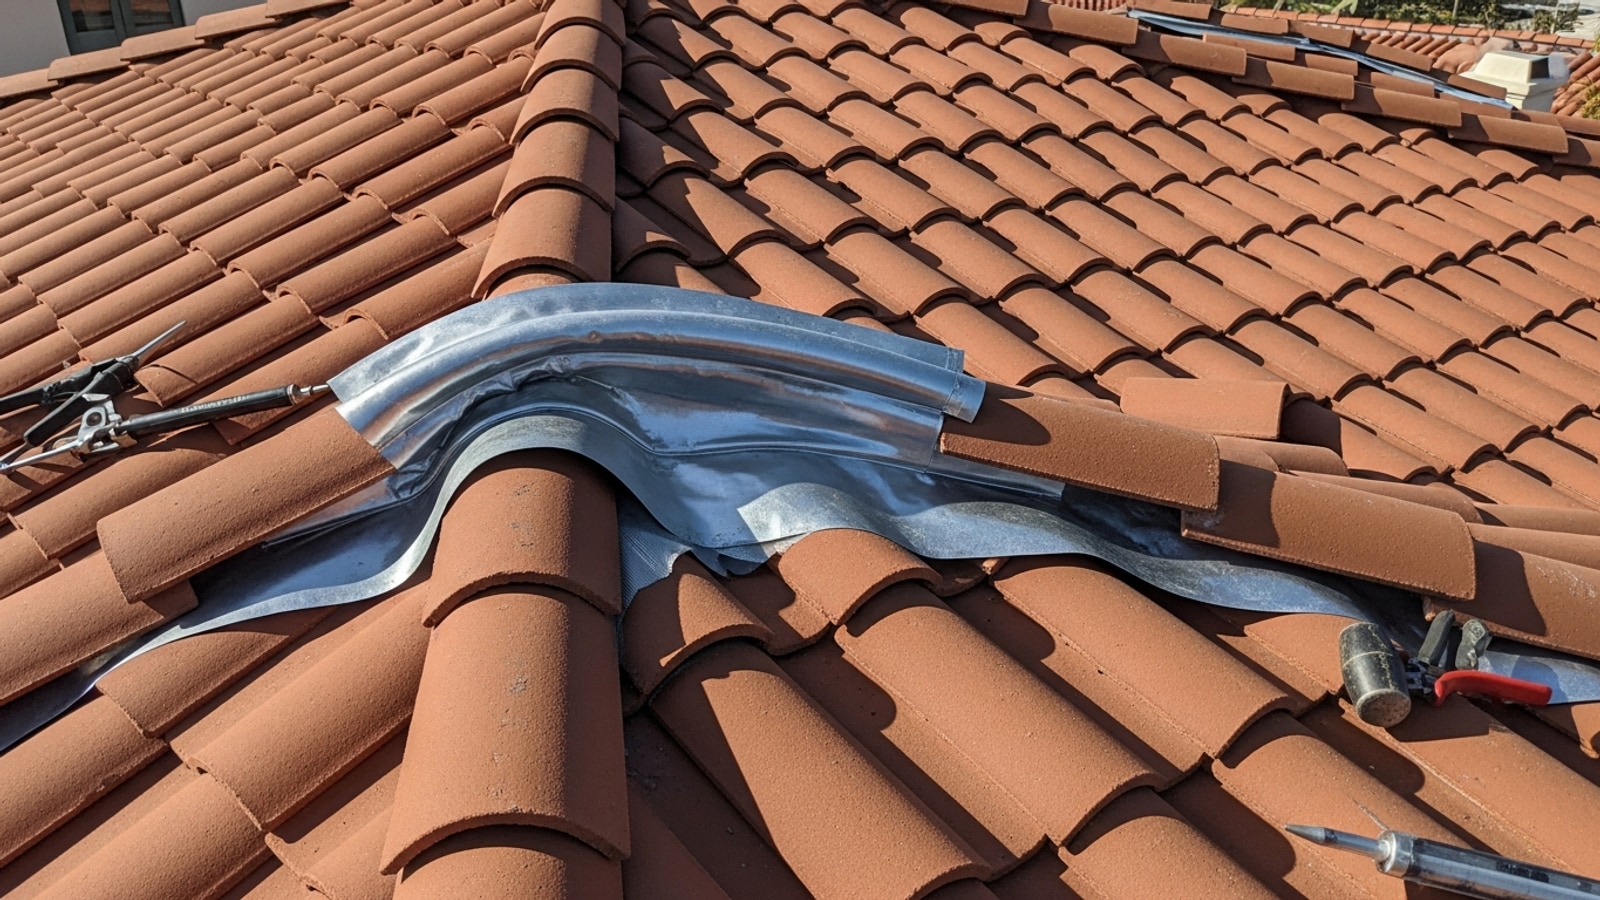
On a Spanish or Mediterranean clay-tile roof, the flashing is a different system entirely — a pliable lead-style flashing apron conformed to the tile profile, tucked under the upslope course, with the tiles set back over the apron. The apron molds to the S-curve of the tile and bridges the gap between the tile field and the skylight.
Setting the unit on the curb
On a curb-mount install, the skylight unit is lowered onto the finished 2x6 curb after the underlayment and ice/water shield are in place. On a steep-slope LA roof, this is a two-person move — both roofers in safety harnesses, one supporting the unit and one guiding it onto the curb. The unit is fastened from the sides per the manufacturer's instructions; the flashing is then woven into the roofing material around it.

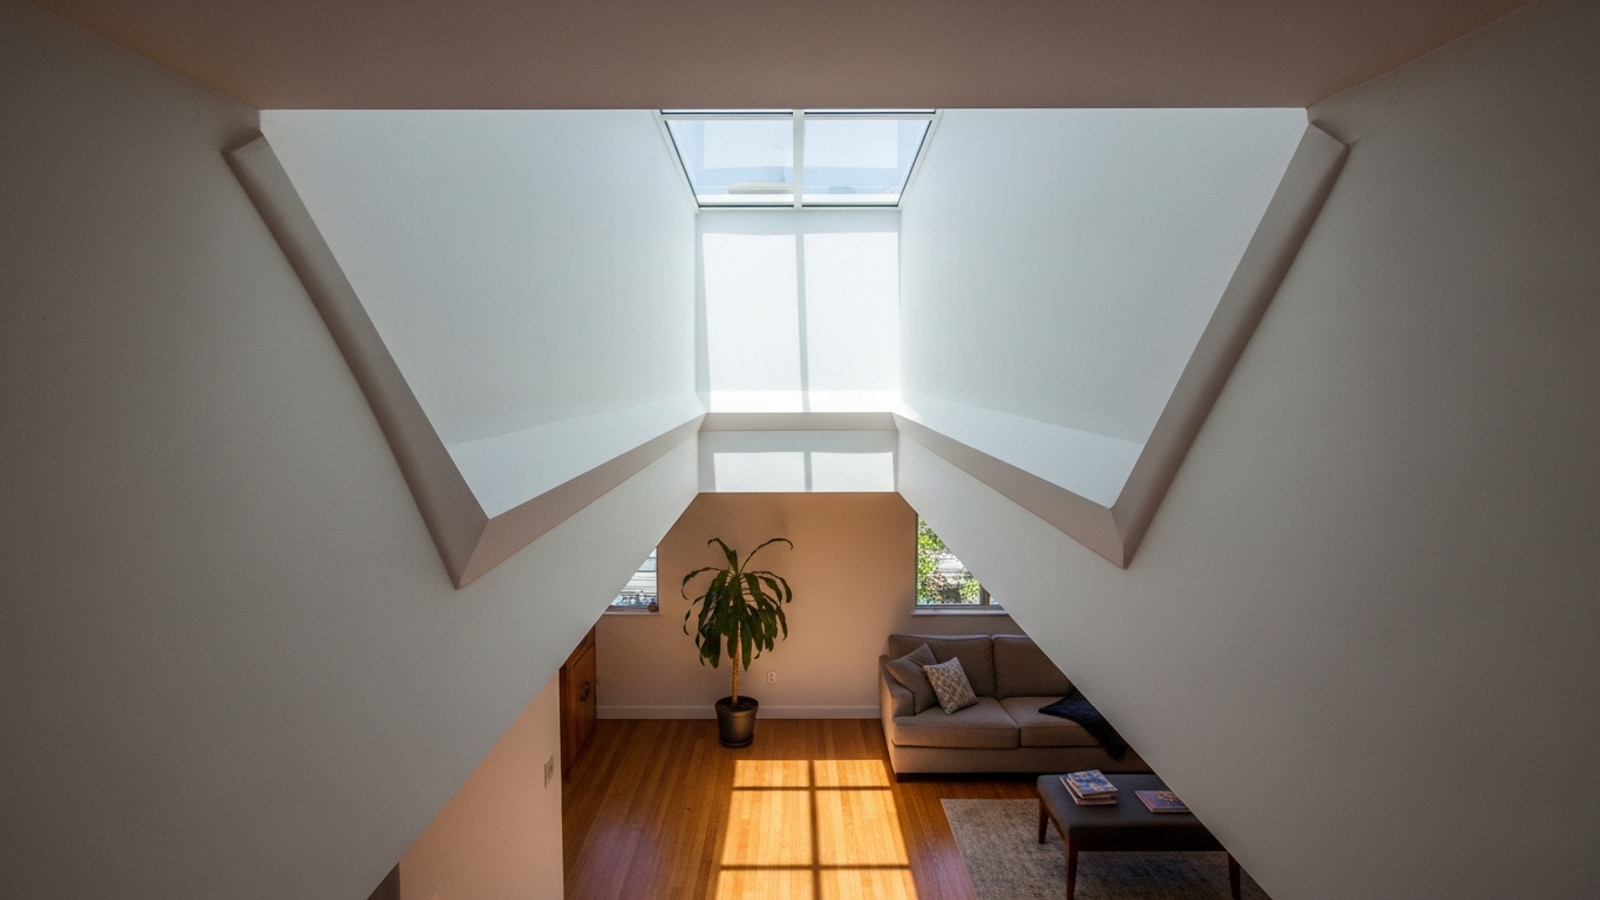
What the room looks like on the inside
The interior side of a skylight install is the part the homeowner actually lives with. The shaft — the framed and drywalled tunnel from the roof opening down to the ceiling line — is what shapes the daylight on the floor below. A straight-shaft skylight directs a tight column of light at one part of the room. A flared shaft, where the opening at the ceiling is wider than the opening at the roof, throws daylight across a much larger floor area. The detail is selected at design and built during the framing and drywall phases.
Title 24 thresholds — replacement versus new opening
California's Title 24 energy code sets two separate thresholds for residential skylights:
- Replacement skylight — maximum U-factor 0.55, maximum SHGC 0.30.
- New construction or new opening — maximum U-factor 0.30, maximum SHGC 0.23.
The contractor documents the U-factor and the SHGC on the permit application from the manufacturer's NFRC label on the unit. The replacement path is more relaxed than the new-opening path, which matters when an existing skylight is being swapped one-for-one.
Permits and inspections
An LADBS combination building/roofing permit is the typical permit for a residential skylight install. Inspections are scheduled at framing of the curb (for curb-mount), at flashing/dry-in, and at final. The permit and the energy compliance documents stay with the home.
FAQ
Will a new skylight leak?
Properly installed skylights — with the right ice/water shield, the right flashing for the roof type, and the roofing material correctly integrated around the unit — do not leak. Almost every leaking skylight call is a flashing or integration problem from a previous install, not a problem with the skylight itself.
Can I add a skylight on a Spanish-tile roof?
Yes. Tile roofs accept skylights cleanly when the install uses a tile-conforming flashing apron — usually a pliable lead-style apron sized for the tile profile. Step flashing intended for asphalt shingles is the wrong detail on tile and is one of the more common causes of tile-roof skylight leaks.
What about a solar-vented or vented skylight?
Vented skylights — solar-powered or hard-wired — are the same install from the roof side. The unit opens for ventilation and closes with a rain sensor. The Title 24 thresholds and the flashing detail are the same as for a fixed unit.
Does replacing a skylight need a permit?
Yes. A like-for-like skylight replacement still requires a permit and Title 24 compliance documentation in Los Angeles, although the energy thresholds are more relaxed than for a new opening cut into an unbroken roof.